Getting Started with Dental 3D Printing in Your Clinic
A Practical Beginner Workflow for Introducing 3D Printing
into Daily Dentistry

Why This Guide Exists
Many dental clinics are interested in bringing 3D printing in-house but are unsure where to begin.
The good news is that dental 3D printing is not difficult. Most clinics already perform every step required, scanning, reviewing cases, and delivering appliances. 3D printing simply connects those familiar steps into a digital workflow.
Where clinics sometimes struggle is not the printer itself,
but understanding the order of the process. Once the sequence becomes clear, the technology becomes predictable and easy to operate day-to-day.
The safest way to learn dental 3D printing is to first understand the workflow that all printed appliances follow. We are not trying to turn your clinic into a laboratory.
This guide explains how clinics successfully introduce printing into everyday dentistry using a controlled and practical approach. After learning this workflow, the same process applies to many common applications including:
• Study models
• Retainers
• Splints
• Surgical guides
• Indirect bonding trays
• Provisionals
The goal is simple: Help your team feel confident operating a dental 3D printer as part of routine
clinical work.
What Actually Changes in Your Clinic
You are not adding a complicated machine, You're adding a small digital workflow. Every successful clinic follows the same sequence:
Scan → Prepare → Print → Clean → Cure → Check → Deliver
Step 1
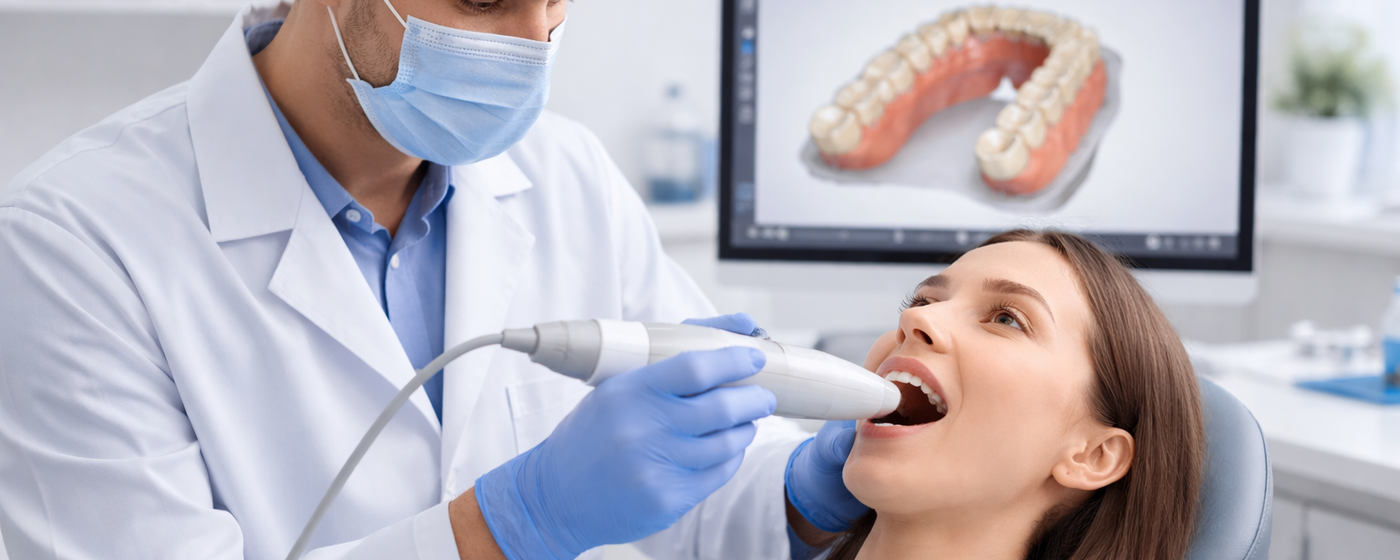
Capture a Good Scan
The printer reproduces exactly what the scan contains.
Before printing, confirm:
• Full anatomy captured
• Gingival margins visible
• No holes in surfaces
• Contacts readable
• Bite aligned correctly (if required)
If the scan is inaccurate, the appliance will be inaccurate, printing cannot fix scan errors.
Export the scan as an STL file.
Step 2
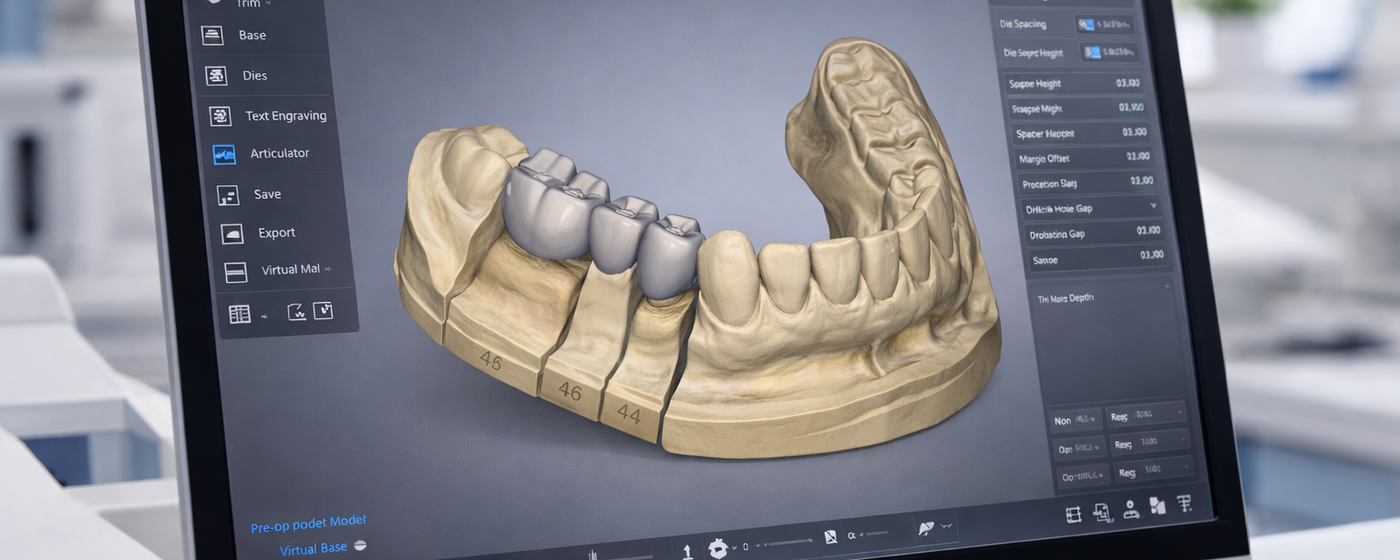
Prepare the Model (Dental CAD Software)
You are not printing the raw scan. You need to create a printable working model.
Common dental software includes:
• 3Shape
• Exocad
• Medit
• BlueSkyPlan
What to do to the scan
Clean it
Remove artifacts and fill small holes
Create a base
Provides stability during printing and post-processing
Trim soft tissue
Improves accuracy and usability
Adjust undercuts if required
Prevents appliance locking or deformation
Label the model
Adds traceability and prevents mix-ups
Export the finished model as an STL.
Step 3
Prepare the Print
Open the model in the printer software (slicer). This is the software that will tell your 3D printer how to print the dental model. Operation include placing the model on the print plate, adding more than 1 model and change any printer settings you require according to the type of resin you are using.
Beginner setup rules
1. Print models flat on the platform
2. Avoid supports on critical surfaces
3. Use validated dental materials
4. Use default manufacturer settings first
Do not optimise yet consistency first, optimisation later.
Step 4
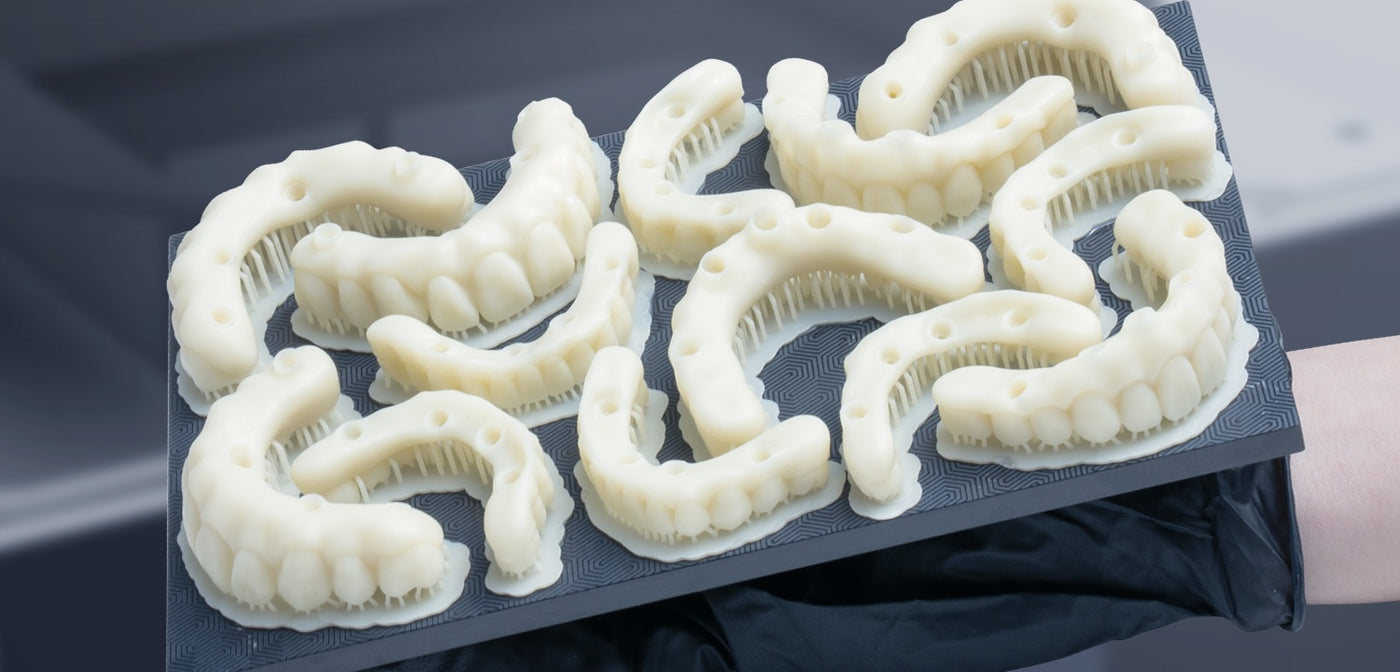
Print the Model
- Shake resin bottle
- Fill resin vat
- Start the print
- Check first layers attached correctly
Typical print time: 20–60 minutes
You do not need to monitor the entire print.
Step 5
Wash the Model
Cleaning affects accuracy more than printing and will effect the final outcome of the 3d printed model. Our Recommended process:
1. First wash removes most resin you can use a separate container that holds a "dirty wash" This is great as it will remove the bulk of the excess resin off your model.
2. Second wash cleans the surface of the model. This is typical carried out in a wash station unit
Total time: 3–6 minutes
Step 6
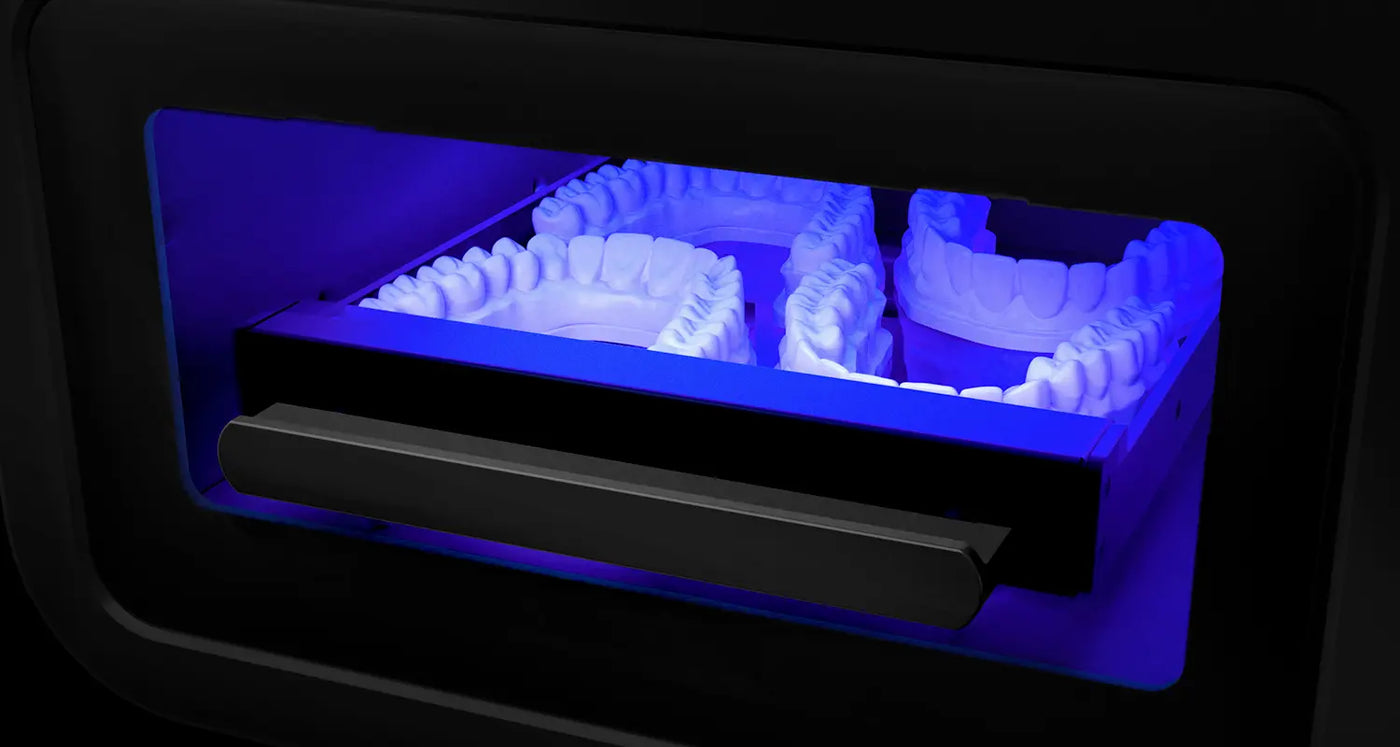
Cure the Model
Curing hardens the model and stabilises its shape. Even after washing the model they maybe tiny particles of uncured resin left on the model. If left uncured the model will suffer damage and is not fully ready for use.
Follow your 3d printer resin instructions exactly as many vary in cure time requirements
Step 7
Inspect Before Use
Check the model:
• Matte surface (not shiny)
• No sticky resin
• Critical anatomy visible
• No warping
If it looks glossy, it is not fully cured.
Where to Go Next
Now that you understand the basic workflow, the next step is seeing how this process applies to a real clinical application.
A common starting point for clinics is producing accurate printed models used in appliance workflows. This helps your team build confidence with scanning, preparation, and post-processing before expanding into more advanced applications.
👉 Read the step-by-step guide to printing dental models for thermoformed clear aligners
Choosing the Right Dental 3D Printing Equipment
Once the workflow is clear, equipment selection becomes much easier. Rather than focusing on specifications alone, you can choose hardware designed around predictable clinical workflows, validated materials, and repeatable results.
Clinics that successfully adopt 3D printing usually start small, establish a repeatable routine, and then expand into additional applications such as splints, guides, and in-house appliances.
Understanding the process first allows the technology to feel straightforward rather than experimental.
Continue Learning About Dental 3D Printing
Starting with the workflow gives your team confidence. From there you can explore individual parts of the process in more detail.
Understand the Equipment
Choosing the Right Printer
Join Our Dental Only Newsletter
Stay ahead in digital dentistry.
Our Dental Only Newsletter is designed exclusively for professionals in the dental industry, keeping you informed about new product launches, pre-orders, technical updates, and educational articles focused on real clinical applications.
We share only what matters to you, just valuable updates and insights to help your clinic or lab stay at the forefront of 3D printing technology.
👉 Join today to receive the latest Phrozen and Monocure3D dental product news, workflow tips, and educational content all tailored to Australian dental professionals.
To ensure we provide the best possible service for your clinic, please use the form below and select your enquiry type, whether it’s about product supply, account setup, or to join our newsletter.
We’ll review your needs and get back to you with tailored options for your clinic.
Contact form
Frequently Asked Questions
Is dental 3D printing difficult to learn?
Is dental 3D printing difficult to learn?
No. Most clinics already perform the individual steps. 3D printing simply connects scanning, design and fabrication into one repeatable workflow.
How long does a dental 3D print take?
How long does a dental 3D print take?
Most dental models print in 20 to 60 minutes, followed by washing and curing.
Do I need special training to start dental 3D printing?
Do I need special training to start dental 3D printing?
NO, 3D printing is easy to learn, clinics can successfully start by following a structured workflow and validated materials.
What is the first application clinics should start with?
What is the first application clinics should start with?
Many clinics begin with printed models before expanding into splints, guides and other appliances.
Let customers speak for us
Love this resin for printing our range of table-top gaming miniatures. It's now become our standard. Makes support removal a dream. They just melt off.

Fast friendly service. Great product. Received welcome emails, confirmations and promo coupons.
I switched to this because isopropyl was stinking up the house from the garage. This has a nice lemon smell, cleans well, doesn't make my eyes burn from the fumes and didn't get cloudy after the first use. It did kick up the VOC readings the same as isopropyl, but didn't linger the entire day when I used my air purifier. Great stuff, will buy more.

I asked a question regarding dental resins, and Luke answered spontaneously - great service!
My order was processed promptly and dispatched to arrive shortly after, well packaged. The couple of questions I had were answered in good time by Luke. I have found a great supplier here in 3D Cast and they will have my future business.
Great business to deal with. Recently after a full days work, I placed an order. 3D Cast was on the ball, as the resin I ordered was different to my previous orders, as it turned out I pushed the wrong button, this was my bugger up. But, rather than just send it, they contacted me and asked if this was right and I was able to correct it.
Great customer service, if they had not done this, I would of had resin I would not use.
For years getting Phrozens Aqua 8K resin into Australia has been frustrating, often requiring ordering from Amazon US, Luke @3D Cast has solved that for us, I’m able to order my staple resin and have it usually the next day, great pricing too, and fantastic customer service! Thanks Luke…
Jason
Scale3DProductions
Melbourne, Victoria
These guys are awesome. Quick and conscientious if there are any issues. Myself and another 3D printing nerd who has had similar bad experiences with other vendors are super impressed. Highly recommended.
Works perfectly with my printer

Ordered this sensational printer and it lives up to Phrozens reputation….Prints beautifully out of the box.
3d cast were fantastic along with the fast shipping very satisfied customer here
